Get a Customized Solution for Your IT Needs
+91 702-705-8777
info@pansofic.com
55-56, 1st floor, Chandigarh Complex, Prabhu Prem Puram, Ambala Cantt, Haryana 133006

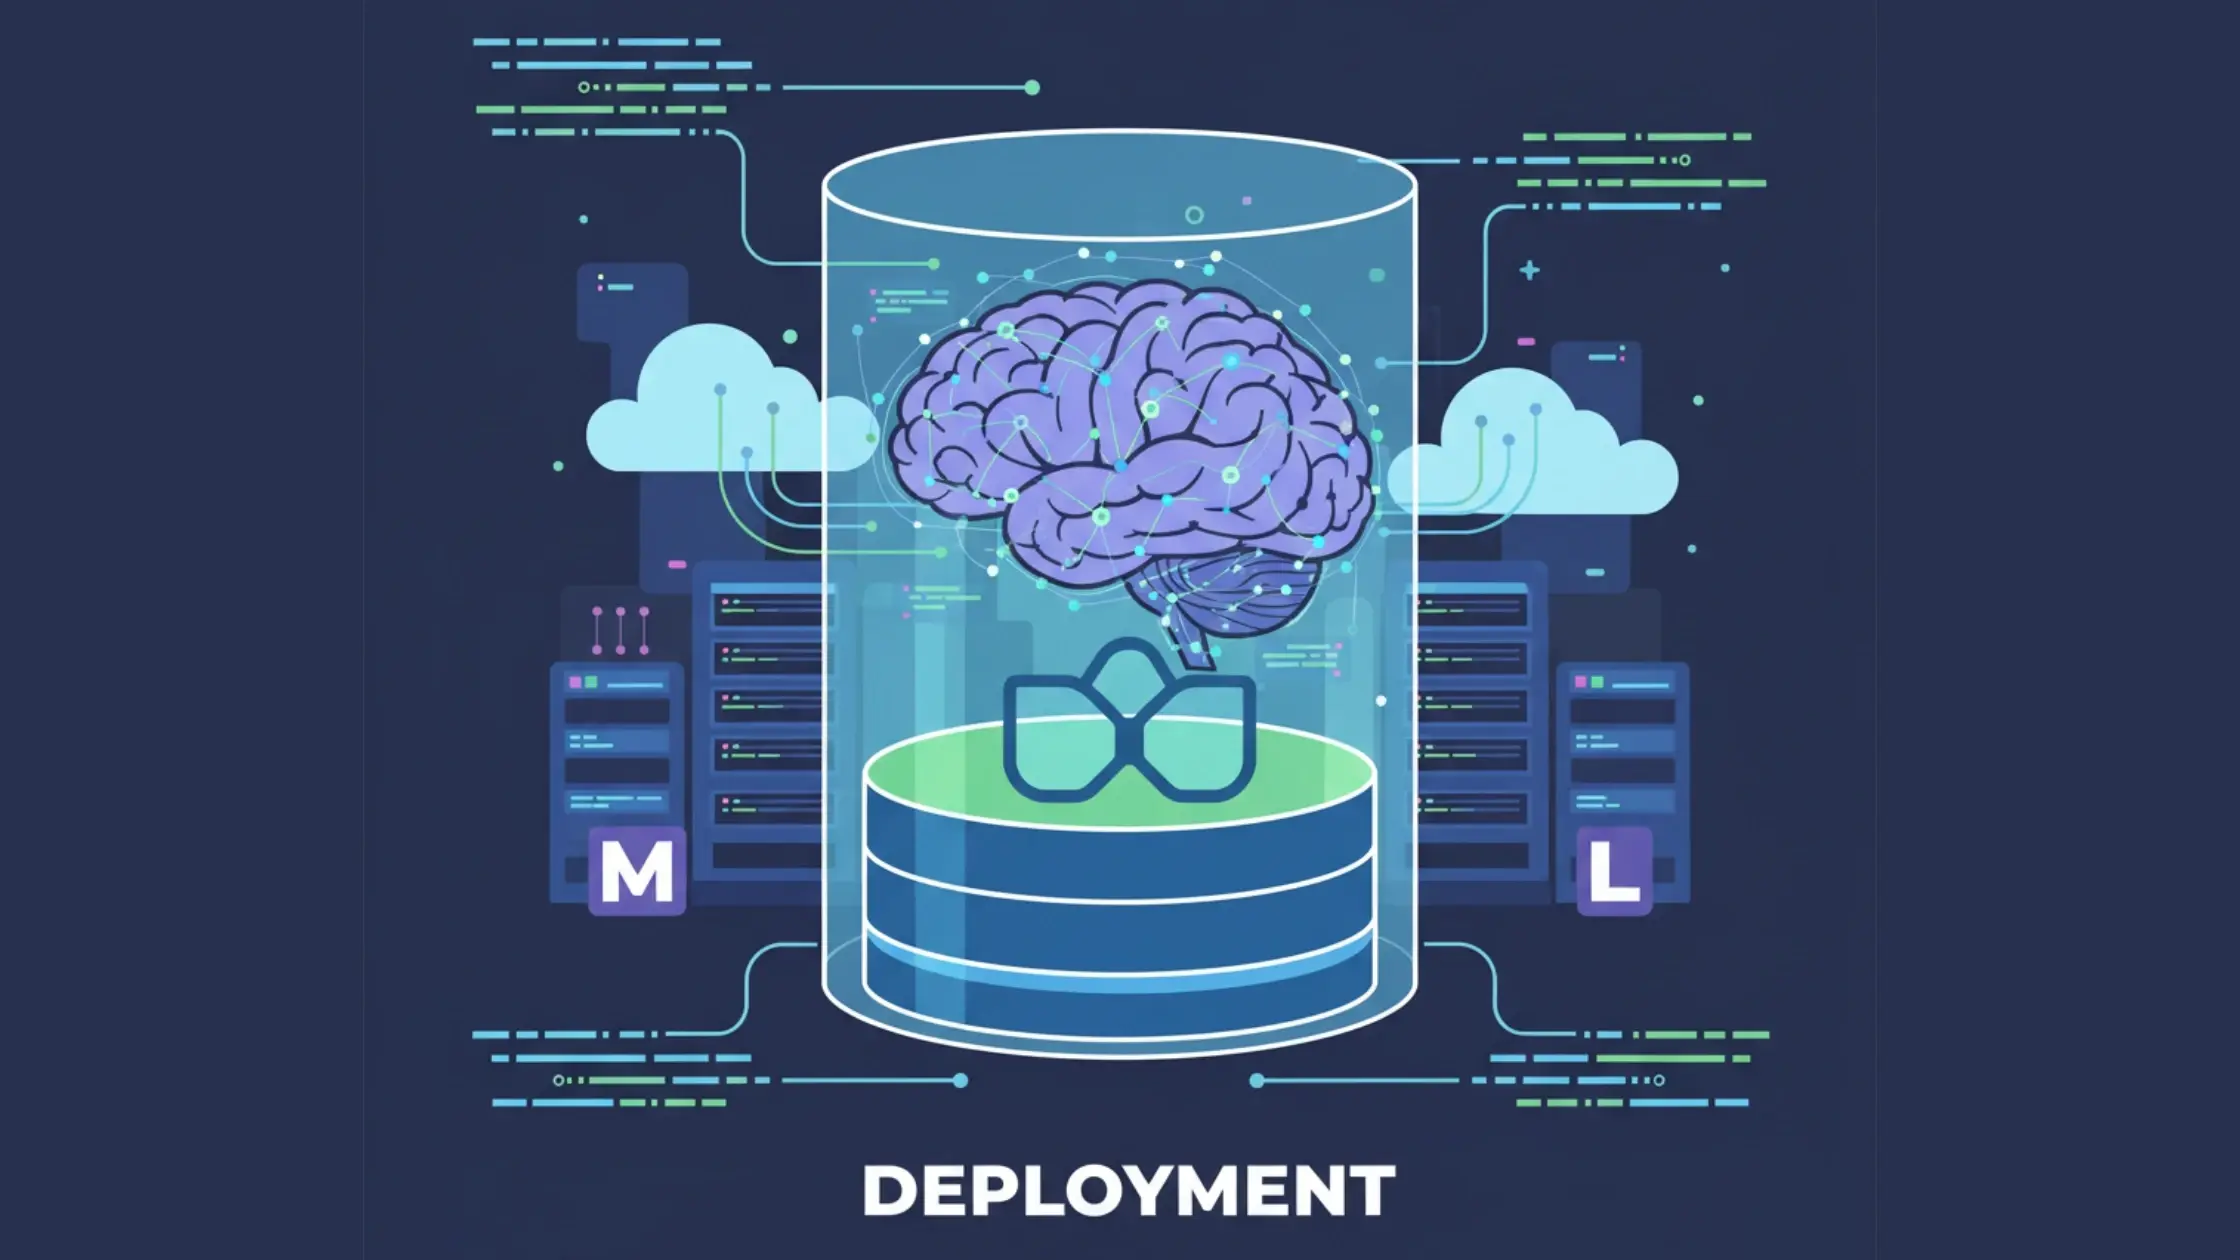
Learn how to run and deploy Large Language Models (LLMs) such as Llama, Mistral, and Falcon inside Docker containers. This in-depth guide covers every step from setting up your environment and writing a Dockerfile to building a FastAPI-based API and enabling GPU support, ensuring scalable, portable, and production-ready AI deployments.
Large Language Models (LLMs) such as Llama, Mistral, and Falcon have become integral to modern software systems. From powering chatbots to enhancing enterprise automation, they bring advanced natural language capabilities into web and backend environments.
However, deploying these models can be challenging due to complex dependencies, environment conflicts, and hardware requirements.
Docker offers a clean, consistent solution. It enables you to package an LLM and all its dependencies into a portable container that runs identically on any system, whether local, in CI/CD, or in the cloud.
This guide walks through the process of running an LLM inside Docker, setting up your environment, creating an image, and exposing your model via an API.
LLMs often require specific Python versions, library builds, and GPU configurations. Reproducing these environments across systems can be error-prone and time-consuming. Docker eliminates that issue by encapsulating your entire runtime in a lightweight, isolated container.
Consistency: Your model runs the same way on every machine.
Portability: Deploy to any environment that supports Docker.
Scalability: Easily spin up multiple instances or integrate with orchestration tools like Kubernetes.
Isolation: Avoid dependency conflicts with other projects.
In practice, containerizing an LLM simplifies everything from testing to production deployment, especially for teams building APIs or web-integrated AI systems.
Before starting, ensure your development environment includes the following.
Tools:
Hardware:
A GPU is optional, but strongly recommended for faster inference when working with larger models.
Knowledge:
To begin, set up a local environment and ensure the model runs correctly before containerizing it.
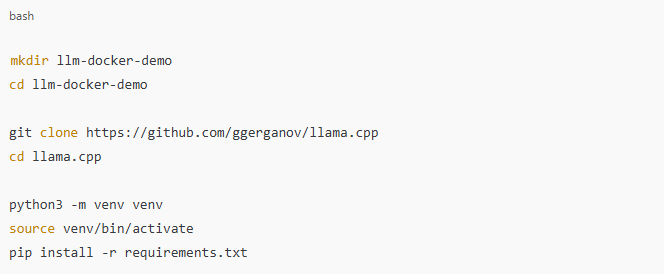
Verify that the LLM executes locally by running a sample inference command or script. Once confirmed, you’re ready to move the setup into Docker.
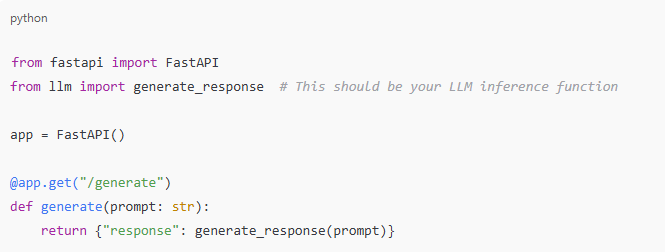
Create a file named Dockerfile in your project root directory with the following content:
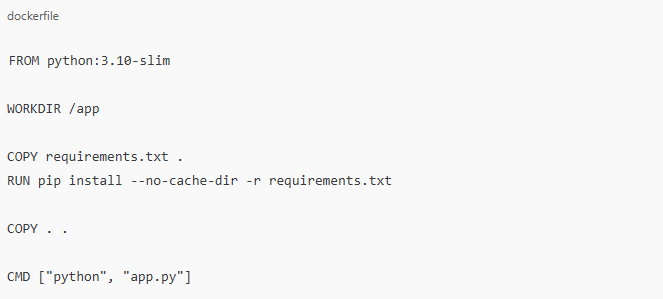
FROM python:3.10-slim: Uses a minimal Python base image to keep the container lightweight.
WORKDIR /app: Defines the working directory inside the container.
FROM python:3.10-slim: Uses a minimal Python base image to keep the container lightweight.
WORKDIR /app: Defines the working directory inside the container.
COPY requirements.txt . and RUN pip install: Installs dependencies before copying the rest of the files to leverage Docker’s build cache.
COPY . .: Adds the application files.
CMD ["python", "app.py"]: Runs the application when the container starts.
For complex projects, consider multi-stage builds to minimize image size.
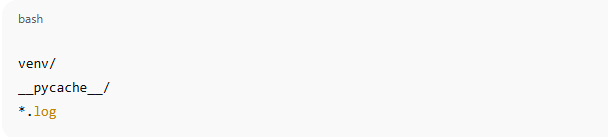
Use a .dockerignore file to exclude unnecessary files:
For complex projects, consider multi-stage builds to minimize image size.
To build and launch your Docker image:


If your application exposes an API, access it via http://localhost:8000.
If it’s CLI-based, you can enter the container shell:

Rebuild and run your container:

Access the API endpoint:

You should receive a JSON response, such as:

You’ve now successfully containerized and exposed your model as a REST API.
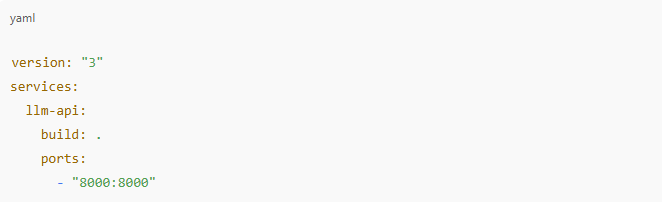
If you want to manage multiple containers (for example, an LLM API and a frontend), use Docker Compose.
docker-compose.yml example:

If your system includes an NVIDIA GPU, you can enable it with:

Ensure the NVIDIA Container Toolkit is installed for GPU passthrough.
Running an LLMhttps://www.cloudflare.com/learning/ai/what-is-large-language-model/ inside Docker provides a scalable and maintainable approach to deploying AI models. You now have a repeatable process for:
Containerizing AI workloads bridges the gap between research and production by ensuring consistency, scalability, and ease of deployment. Once your LLM works within Docker, it becomes deployable anywhere your application stack needs it.


Nov 07, 2025

Jan 21, 2026
Jul 18, 2025
Dec 24, 2025

Apr 17, 2026